
Yesterday you saw my round-up of striking painted stair runners. And now, it's time to reveal my own, which pales in comparison for sure.
The project was low-risk in the fact that my "victim" stairs are the home's back, poorly lit stairs. This project would be significantly harder to pull off if you have only one stairwell, because I'm not sure how you would get up and downstairs during the project's duration (which lasts several days when you account for paint drying).
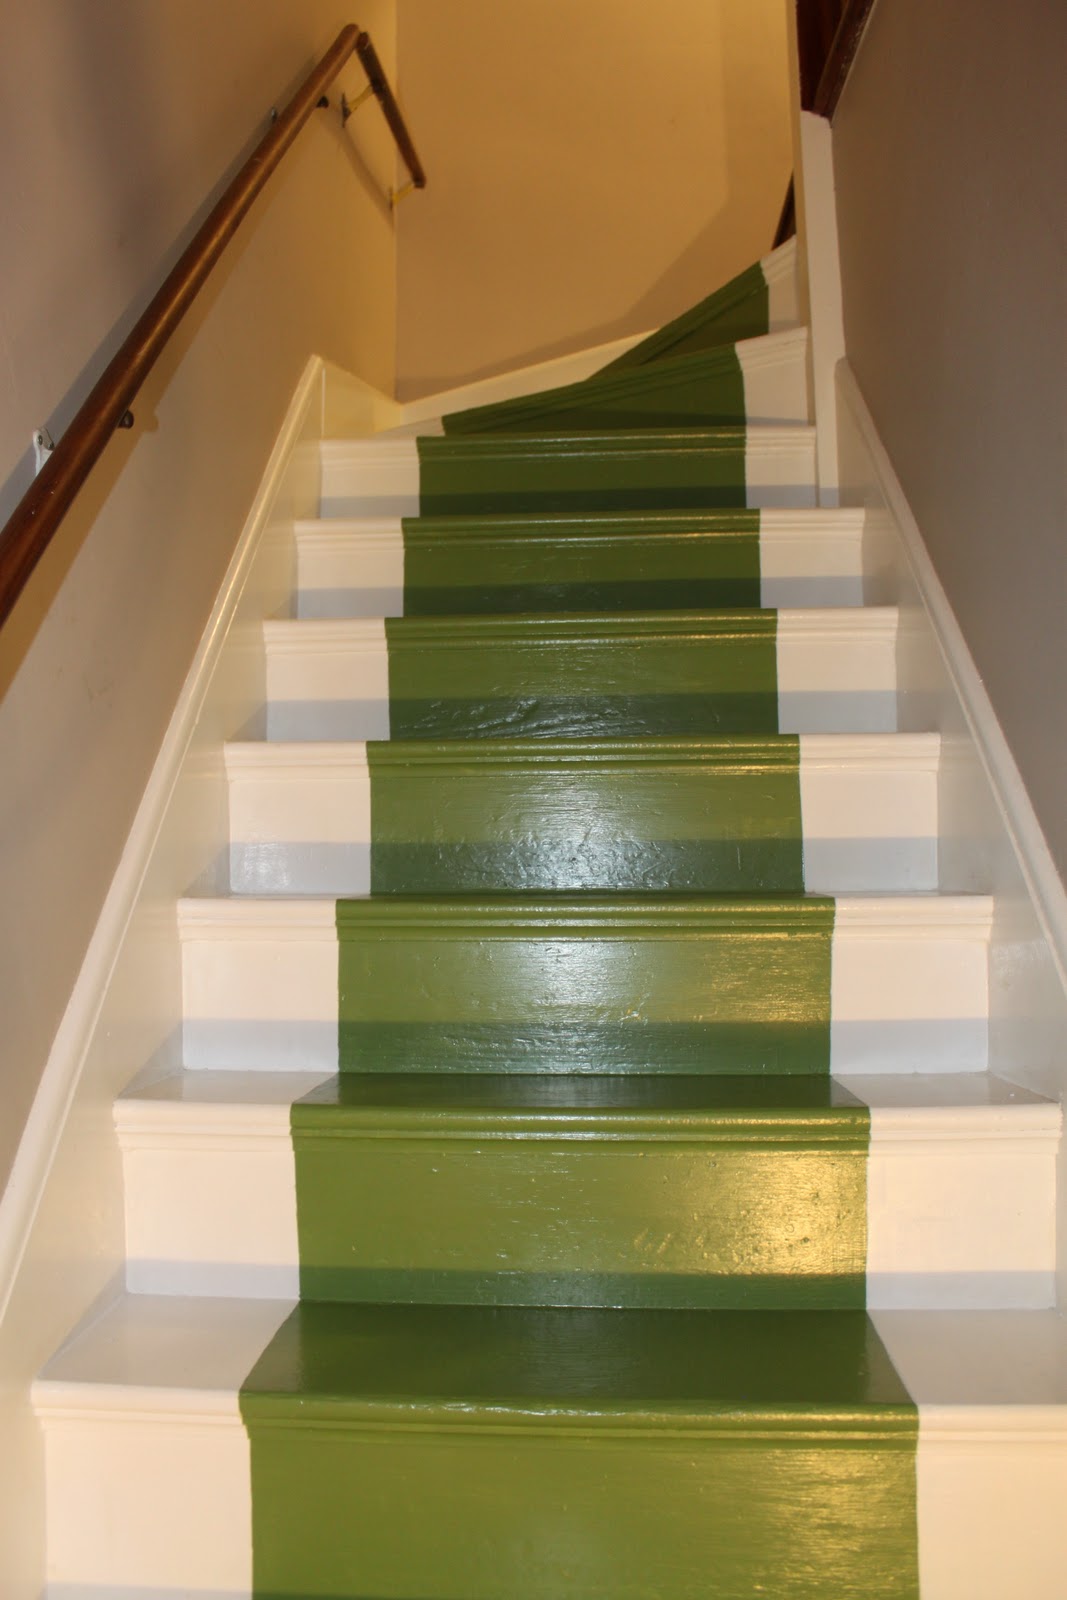
I started by deciding on the width of the "runner" I was going to paint, and taped accordingly, measuring 7 inches from each wall.

After I taped (I used typical painter's blue tape, but I've since heard that frog tape is even better), I started painting. My first error - ooops, don't start from the bottom up otherwise you have no where dry to stand while you paint!

Your lines will come out sharpest and cleanest if you use the tape as a guide, rather than paint over it. After two coats, it was time to (slowly) take off the tape....

The after! I needed to do some significant touching up of the lines by hand, with a small paintbrush from Michaels.


Once the paint dries completely, I'll add a coat or two of this Polycrylic Protective Finish to help preserve the project.

What do you think? Should I add a narrow border in brown or black? Or stencilled numbers like we saw yesterday?
Deb
Looks fab! A border would be awesome :-) I may try to rock the numbers down to the playroom. Right after I finish the living room. And the kitchen. And...
ReplyDeleteLooks great! I like it just the way it is!
ReplyDeleteIts fabulous! I wish I had stairs to paint like this, its a great project. A border in brown or even dark orange or navy would be amazing!
ReplyDeleteIt looks great. I'm sort of doing mine.. taking ages as the only loo in the house is upstairs but now re - inspired.
ReplyDelete